WLAN Access Point APN

Erstellen des WLAN Access Point APN mit USB

Linux: Debian 12.7 (cat /etc/debian_version)

Liste den USB WLAN Stick

root@hpt:/home/tomas# lsusb
...
Bus 002 Device 003: ID 8087:0aa7 Intel Corp. Wireless-AC 3168 Bluetooth
...

Install Intel Firmware, da der USB Stick „Intel Corp. Wireless-AC 3168 Bluetooth“

apt install firmware-iwlwifi iw

Ermittle den Namen des WLAN Interfaces – in diesem Fall wlp2s0

root@hpt:/home/tomas# ll /sys/class/net/
lrwxrwxrwx 1 root root 0 Sep 24 08:12 enp1s0 -> ../../devices/pci0000:00/0000:00:02.2/0000:01:00.0/net/enp1s0
lrwxrwxrwx 1 root root 0 Sep 24 08:12 lo -> ../../devices/virtual/net/lo
lrwxrwxrwx 1 root root 0 Sep 24 08:12 wlp2s0 -> ../../devices/pci0000:00/0000:00:02.3/0000:02:00.0/net/wlp2s0

hostapn – AccessPoint

Install hostapd – betreibt den Accesspoint

apt install hostapd

Einstellungen in /etc/hostapd/hostapd.conf

### Wireless network name ###
interface=wlp2s0
driver=nl80211
ssid=tomastest
# a = IEEE 802.11a, b = IEEE 802.11b, g = IEEE 802.11g
hw_mode=g
channel=1
wpa=2
wpa_passphrase=test123456
## Key management algorithms ##
wpa_key_mgmt=WPA-PSK
#
## Set cipher suites (encryption algorithms) ##
## TKIP = Temporal Key Integrity Protocol
## CCMP = AES in Counter mode with CBC-MAC
wpa_pairwise=TKIP
rsn_pairwise=CCMP
#
## Shared Key Authentication ##
auth_algs=1
#
## Accept all MAC address ###
macaddr_acl=0

## Log-Einstellungen
# "-1" = alle Module loggen, "3" z.B. loggt nur WPA
logger_syslog=-1
# "2" = informative Meldungen, "1" = Debuggen, "0" = echt alles loggen
logger_syslog_level=2
# wie oben, nur Ausgabe auf Konsole, wenn Programm nicht im Hintergrund läuft
logger_stdout=-1
# wie oben
logger_stdout_level=1## Ländercode # Ländercode setzen country_code=DE # Ländercode aktivieren, "0" = aus (default) ieee80211d=1

Starte hostapn als root um Verbindungen zu testen:

root@hpt:/home/tomas# hostapd -d /etc/hostapd/hostapd.conf
...
wlp2s0: STA 62:61:aa:63:5f:50 IEEE 802.11: authentication OK (open system)
wlp2s0: STA 62:61:aa:63:5f:50 MLME: MLME-AUTHENTICATE.indication(62:61:aa:63:5f:50, OPEN_SYSTEM)
wlp2s0: STA 62:61:aa:63:5f:50 MLME: MLME-DELETEKEYS.request(62:61:aa:63:5f:50)
...
wlp2s0: STA 62:61:aa:63:5f:50 WPA: pairwise key handshake completed (RSN)
wlp2s0: EAPOL-4WAY-HS-COMPLETED 62:61:aa:63:5f:50

Die Verbindung zu einem APN wurde erfolgreich hergestellt. Der standard logging für hostapn wurde ist im /var/log/syslog.

Starte hostapn als system dienst: root@hpt:/home/tomas# systemctl enable --now hostapd.service

Network Configuration

Der WLAN Adapter wlp2s0 muss eine feste IP Adresse haben in IP Bereich  dass NICHT dem lokalen Netz zugeordnet ist. Dieser IP Bereich dient lediglich den APN. In diesem Fall 10.0.0.1

root@hpt:/home/tomas# cat /etc/network/interfaces
# This file describes the network interfaces available on your system
# and how to activate them. For more information, see interfaces(5).

source /etc/network/interfaces.d/*

# The loopback network interface
auto lo
iface lo inet loopback

# The primary network interface
allow-hotplug enp1s0
iface enp1s0 inet dhcp

# WLAN mit fester Adresse für hostapd
auto wlp2s0
iface wlp2s0 inet static
address 10.0.0.1
netmask 255.255.255.0
broadcast 10.0.0.255

Enable IPv4 Forwadinf in /etc/sysctl.conf

root@hpt:/home/tomas# cat /etc/sysctl.conf |grep ip_forward
# Uncomment the next line to enable packet forwarding for IPv4
net.ipv4.ip_forward=1

Definiere IP tables rules

iptables -A FORWARD -o enp1s0 -i wlp2s0 -s 192.168.0.0/24 -m conntrack --ctstate NEW -j ACCEPT
iptables -A FORWARD -m conntrack --ctstate ESTABLISHED,RELATED -j ACCEPT
iptables -t nat -A POSTROUTING -o enp1s0 -j MASQUERADE

Install persistence iptables rules apt install iptables-persistent um diese Änderungen persistent zu machen

root@hpt:/home/tomas# cat /etc/iptables/rules.v4
# Generated by iptables-save v1.8.9 (nf_tables) on Sun Sep 22 13:42:43 2024
*filter
:INPUT ACCEPT [0:0]
:FORWARD ACCEPT [0:0]
:OUTPUT ACCEPT [0:0]
-A FORWARD -s 192.168.0.0/24 -i wlp2s0 -o enp1s0 -m conntrack --ctstate NEW -j ACCEPT
-A FORWARD -m conntrack --ctstate RELATED,ESTABLISHED -j ACCEPT
COMMIT
# Completed on Sun Sep 22 13:42:43 2024
# Generated by iptables-save v1.8.9 (nf_tables) on Sun Sep 22 13:42:43 2024
*nat
:PREROUTING ACCEPT [0:0]
:INPUT ACCEPT [0:0]
:OUTPUT ACCEPT [0:0]
:POSTROUTING ACCEPT [0:0]
-A POSTROUTING -o enp1s0 -j MASQUERADE
COMMIT
# Completed on Sun Sep 22 13:42:43 2024

DNSMasq – DNS und DHCP Server
Installiere lokalen DNS und DHCP Server: apt install dnsmasq

Einstellungen in /etc/init.d/dnsmasq.conf

server=192.168.178.1 # Forward alle DNS Anfrage zum vorhandenem DNS Server
interface=wlp2s0
except-interface=lo,enp1s0
bind-interfaces # Um Probleme mit dem Port 53 von systemd umzugehen
dhcp-range=interface:wlp2s0,10.0.0.20,10.0.0.30,12h
# Nur für debugging
log-queries
log-dhcp

Starten den Dienst systemctl enable --now dnsmasq.service

Ausgaben in /var/log/syslog

2024-09-24T12:31:28.636273+02:00 hpt dnsmasq-dhcp[19201]: 3835516886 available DHCP range: 10.0.0.20 -- 10.0.0.30
2024-09-24T12:31:28.636520+02:00 hpt dnsmasq-dhcp[19201]: 3835516886 vendor class: android-dhcp-14
2024-09-24T12:31:28.636637+02:00 hpt dnsmasq-dhcp[19201]: 3835516886 client provides name: Handy-von-Tomas
2024-09-24T12:31:28.636752+02:00 hpt dnsmasq-dhcp[19201]: 3835516886 DHCPREQUEST(wlp2s0) 10.0.0.24 62:61:aa:63:5f:50
2024-09-24T12:31:28.636878+02:00 hpt dnsmasq-dhcp[19201]: 3835516886 tags: interface:wlp2s0, wlp2s0
2024-09-24T12:31:28.636995+02:00 hpt dnsmasq-dhcp[19201]: 3835516886 DHCPACK(wlp2s0) 10.0.0.24 62:61:aa:63:5f:50 Handy-von-Tomas
...
2024-09-24T12:31:28.744018+02:00 hpt dnsmasq[19201]: query[A] connectivitycheck.gstatic.com from 10.0.0.24
2024-09-24T12:31:28.744232+02:00 hpt dnsmasq[19201]: forwarded connectivitycheck.gstatic.com to 192.168.178.1
2024-09-24T12:31:28.759666+02:00 hpt dnsmasq[19201]: reply connectivitycheck.gstatic.com is 172.217.18.99

Creating a custom Public Key Infrastructure (PKI) with OpenSSL

How to create a custom PKI Infrastructure with root ca and intermediate ca with openssl.

Directory structure that holds root ca and intermediate ca PKI files. This structure separates the root CA from the intermediate CA, enhancing security by keeping the root CA offline.

mkdir -p ~/ca-tomdus/{certs,crl,newcerts,private}
chmod 700 ~/ca-tomdus/private
touch ~/ca-tomdus/db/index
openssl rand -hex 16 > ~/ca-tomdus/serial

mkdir -p ~/ca-tomdus/intermediate/{certs,crl,newcerts,private}
chmod 700 ~/ca-tomdus/intermediate/private
touch ~/ca-tomdus/intermediate/db/index
openssl rand -hex 16 > ~/ca-tomdus/intermediate/serial

Create ca-tomdus.conf openssl configuration file.

[default]
name = tomdus-root-ca
domain_suffix = tomdus.lab
aia_url = http://$name.$domain_suffix/$name.crt
crl_url = http://$name.$domain_suffix/$name.crl
default_ca = ca_default
name_opt = utf8,esc_ctrl,multiline,lname,align

[ca_dn]
countryName = "DE"
organizationName = "tomdus"
commonName = Common Name (FQDN or YOUR name)
commonName_max = 64

[ca_default]
home = ~/ca-tomdus/intermediate
certs = $home/certs
database = $home/db/index
serial = $home/db/serial
crlnumber = $home/db/crlnumber
certificate = $home/$name.crt
private_key = $home/private/$name.key
RANDFILE = $home/private/random
new_certs_dir = $home/certs
unique_subject = no
copy_extensions = copy
default_days = 3650
default_crl_days = 365
default_md = sha256
policy = policy_c_o_match

[policy_c_o_match]
countryName = match
stateOrProvinceName = optional
organizationName = match
organizationalUnitName = optional
commonName = supplied
emailAddress = optional

[req]
default_bits = 4096
encrypt_key = no
default_md = sha256
utf8 = yes
string_mask = utf8only
prompt = no
distinguished_name = ca_dn

[root_ca_ext]
basicConstraints = critical,CA:true
authorityKeyIdentifier = keyid:always,issuer
keyUsage = critical,keyCertSign,cRLSign,digitalSignature
subjectKeyIdentifier = hash


[sub_ca_ext]
authorityInfoAccess = @issuer_info
authorityKeyIdentifier = keyid:always
basicConstraints = critical,CA:true,pathlen:0
crlDistributionPoints = @crl_info
extendedKeyUsage = clientAuth,serverAuth
keyUsage = critical,keyCertSign,cRLSign,digitalSignature
nameConstraints = @name_constraints
subjectKeyIdentifier = hash

[crl_info]
URI.0 = $crl_url

[issuer_info]
caIssuers;URI.0 = $aia_url

[name_constraints]
permitted;DNS.0=tomdus.lab
permitted;DNS.1=*.tomdus.dev
excluded;IP.0=0.0.0.0/0.0.0.0
excluded;IP.1=0:0:0:0:0:0:0:0/0:0:0:0:0:0:0:0


[server_ext]
authorityInfoAccess = @issuer_info
authorityKeyIdentifier = keyid:always
basicConstraints = critical,CA:false
crlDistributionPoints = @crl_info
extendedKeyUsage = clientAuth,serverAuth
keyUsage = critical,digitalSignature,keyEncipherment
subjectKeyIdentifier = hash

Generate root CA key and certificate

Change in ca-tomdus.conf  from ~/ca-tomdus/intermediate to ~/ca-tomdus and copy_extensions = copy to copy_extensions = none

openssl genpkey -algorithm RSA -out ~/ca-tomdus/private/tomdus-root-ca.key -aes256 -pkeyopt rsa_keygen_bits:4096
chmod 400 ~/ca-tomdus/private/tomdus-root-ca.key
openssl req -config ~/ca-tomdus/ca-tomdus.conf -key ~/ca-tomdus/private/tomdus-root-ca.key -new -x509 -days 3650 -sha256 -extensions root_ca_ext -out ~/ca-tomdus/certs/tomdus-root-ca.crt
Generate intermediate CA key and certificate
openssl genpkey -algorithm RSA -out ~/ca-tomdus/intermediate/private/tomdus-ca.key -aes256 -pkeyopt rsa_keygen_bits:4096
chmod 400 ~/ca-tomdus/intermediate/private/tomdus-ca.key

Generate CSR

openssl req -config ~/ca-tomdus/ca-tomdus.conf -new -key ~/ca-tomdus/intermediate/private/tomdus-ca.key -out ~/ca-tomdus/intermediate/csr/tomdus-ca.csr

Sign CSR with root CA

openssl ca -config ~/ca-tomdus/ca-tomdus.conf -extensions sub_ca_ext -days 3650 -md sha256 -in ~/ca-tomdus/intermediate/csr/tomdus-ca.csr -out ~/ca-tomdus/intermediate/certs/tomdus-ca.crt

Sample Code: https://gitlab.com/tomdus/pki-infrastructure/

Create custom SELinux Policy

Problem: The apche httpd cannot connect to tomcat running on port 8009 with AJP protocol.

Detection

curl localhost returns 503

curl localhost
<!DOCTYPE HTML PUBLIC "-//IETF//DTD HTML 2.0//EN">
<html><head>
<title>503 Service Unavailable</title>
</head><body>
<h1>Service Unavailable</h1>
<p>The server is temporarily unable to service your
request due to maintenance downtime or capacity
problems. Please try again later.</p>
</body></html>

There is Permission denied: AH00957 in apache httpd (ssl)_error_log

sudo cat /var/log/httpd/error_log
[Wed Feb 15 16:24:38.140421 2023] [proxy:error] [pid 10679:tid 10824] (13)Permission denied: AH00957: AJP: attempt to connect to 127.0.0.1:8009 (127.0.0.1) failed[Wed Feb 15 16:24:38.140455 2023] [proxy:error] [pid 10679:tid 10824] AH00959: ap_proxy_connect_backend disabling worker for (127.0.0.1) for 60s[Wed Feb 15 16:24:38.140458 2023] [proxy_ajp:error] [pid 10679:tid 10824] [client 127.0.0.1:36812] AH00896: failed to make connection to backend: 127.0.0.1

Remedy (1)

sudo setsebool -P httpd_can_network_connect 1

Remedy (2)

Create custom SELinux policy, let generate type enforcement file

sudo grep http /var/log/audit/audit.log | grep denied | audit2allow -m httplocalconf > httplocalconf.te

Edit generated type enforcement httplocalconf.te file

module httplocalconf 1.0;

require {
        type httpd_t;
        type http_port_t;
        class tcp_socket name_connect;
        class file read;
}

#============= httpd_t ==============

#!!!! This avc can be allowed using one of the these booleans:
#     httpd_can_network_connect, httpd_graceful_shutdown, httpd_can_network_relay, nis_enabled
allow httpd_t http_port_t:tcp_socket name_connect;

Convert it to policy module

checkmodule -M -m -o httplocalconf.mod httplocalconf.te

Compile new  policy

semodule_package -o httplocalconf.pp -m httplocalconf.mod

Install new policy

sudo semodule -i httplocalconf.pp

Links

How to create its own custom SELinux policy module wisely

How to read and correct SELinux denial messages

Chapter 5. Troubleshooting problems related to SELinux

Install / Setup Active Directory

Ziel ist die Installation zum Testzwecken von MS Active Directory in einer virtual box

Setup Windows Server 2022

Download ISO from https://www.microsoft.com/en-us/evalcenter/download-windows-server-2022

Install Windows Active Directory

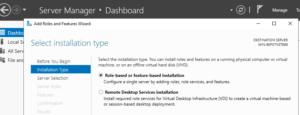
  1. Server Manager > Manage > Add Roles and Features
  2. Opens the Add Roles and Features Wizard
  3. Wähle Role-based or feature-based installation
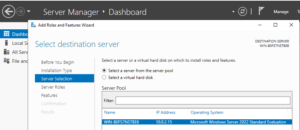
  4. Wähle Select a server from the server pool
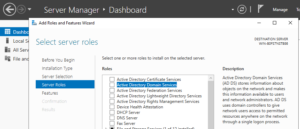
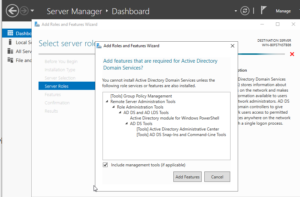
  5. Wähle Active Directory Domain Services aus Roles
  6. Bestätige Add Features
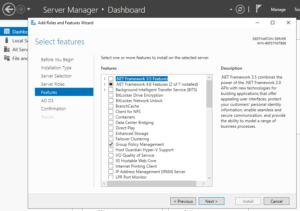
  7. Bestätige Select Features
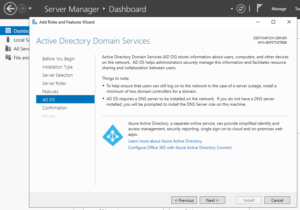
  8. Bestätige Active Directory Somain Services
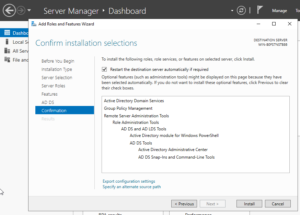
  9. Übersicht Confirmation installation sections

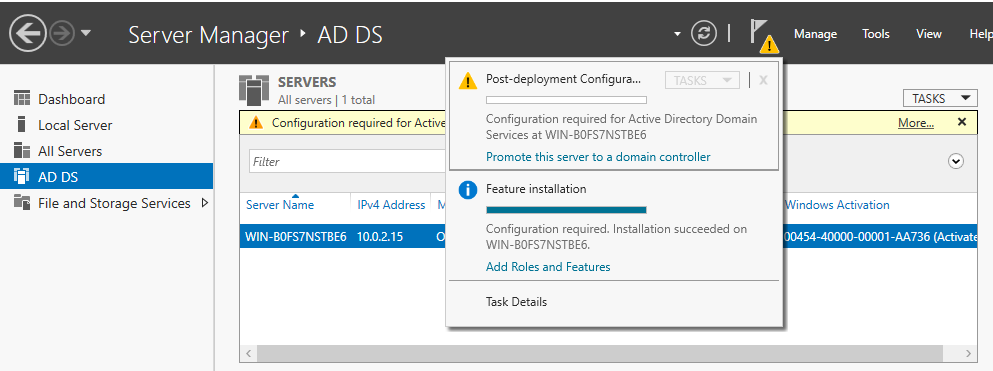
Promote Server to Domain Controller

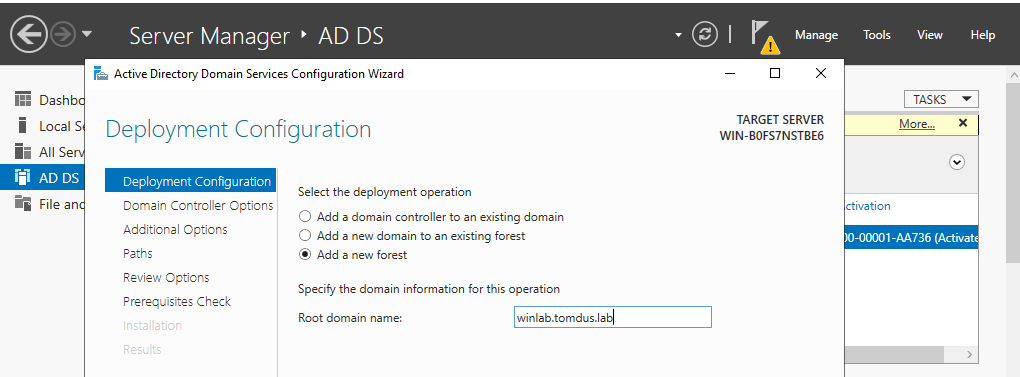
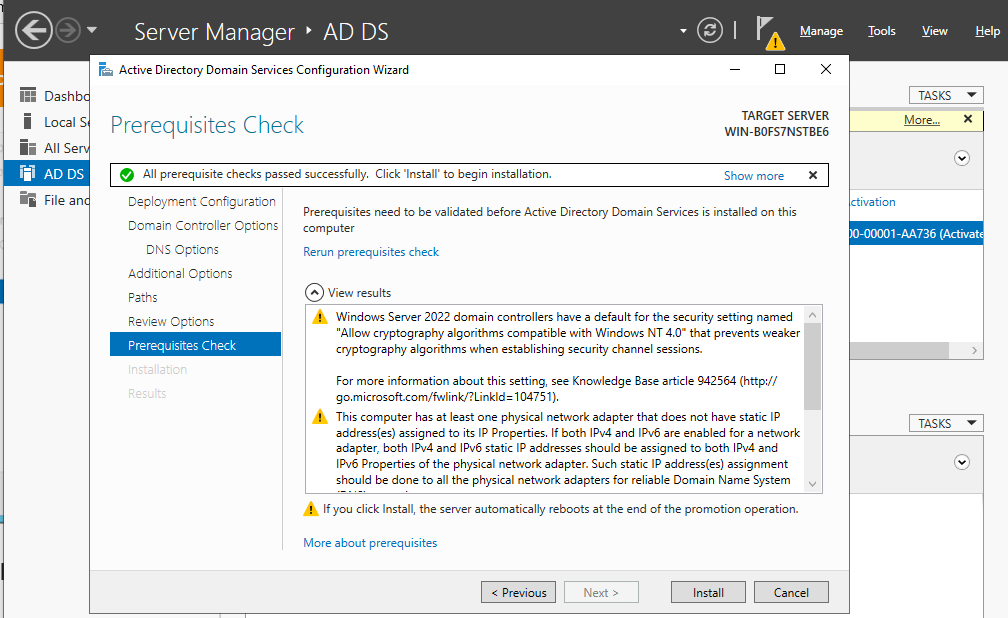
  1. Klick Promote this Server to Domain Controller
  2. Enter new Root domain name (e.g. winlab.tomdus.lab)
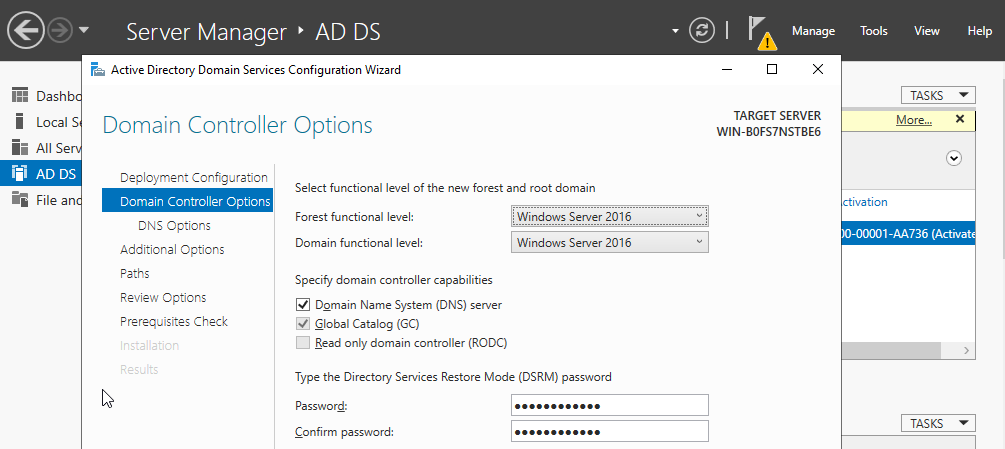
  3. Setzte Directory Service Restore Mode Password
  4. Ignore DNS Options
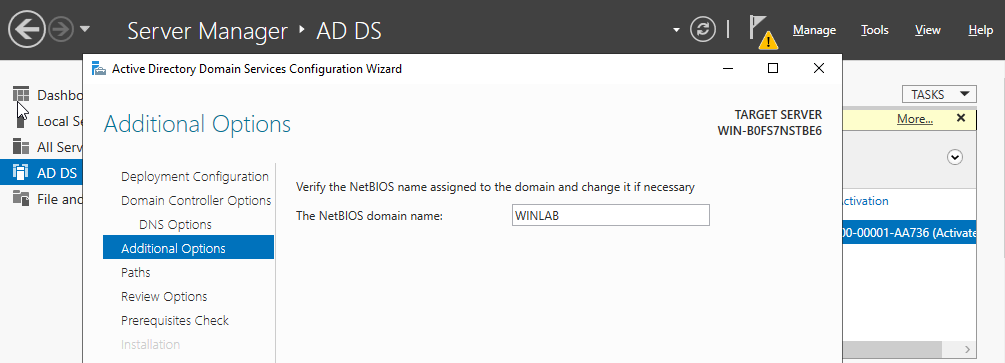
  5. Bestätige NetBIOS Domain Name (Immer in Großbuchstaben)
  6. Installations Pfade
  7. Review Options
  8. Prerequisites Checks – Klick Install

Install IPA Server and replicas (cluster)

IPA Server can be installed standalone or as master – master cluster

Create Master – Master cluster (simple option)

  1. Install and create stand alone IPA Server (@ipa1)
  2. Install client on IPA Client (@ipa3)
  3. Promote ipa client on @ipa3 to server a master
  4. Install ca certificates on ipa3

1. Install and create standalone IPA Sever

For simplicty all password are 123456798; dns forwarder 192.168.178.1 (acces to internet)

sudo dnf module enable idm:DL1/server -y
sudo dnf module enable idm:DL1/dns -y
sudo dnf distro-sync
sudo dnf module install idm:DL1/server -y
sudo dnf module install idm:DL1/dns -y
sudo dnf install ipa-server -y
sudo dnf install ipa-server-dns -y
sudo ipa-server-install --domain=ipa.tomdus.lab --realm=IPA.TOMDUS.LAB --ds-password=123456798 --admin-password=123456798 --mkhomedir --ssh-trust-dns --idstart=100000 --no-ntp --setup-dns --forwarder=192.168.178.1 --auto-reverse --allow-zone-overlap

...

sudo firewall-cmd --add-service={http,https,ldap,ldaps,kerberos,kpasswd,dns} --permanent
sudo firewall-cmd --reload

2. Install IPA client

In order to install ipa client it is sufficient to enable only idl:DL1/client module, thus as this server will be promoted to IPA Replica muss enable idl:DL1/server and idl:DL1/dns (required by DNS Server)
[tomas@ipa3 ~]$ sudo dnf module list idm:DL1
Last metadata expiration check: 0:00:17 ago on Wed 08 Jun 2022 01:45:55 PM CEST.
CentOS Stream 8 - AppStream
Name Stream Profiles Summary
idm DL1 adtrust, client, common [d], dns, server The Red Hat Enterprise Linux Identity Management system module
Hint: [d]efault, [e]nabled, [x]disabled, [i]nstalled

sudo dnf module enable idm:DL1/server -y
sudo dnf module enable idm:DL1/dns -y
sudo dnf distro-sync -y

sudo dnf module install idm:DL1/server -y
sudo dnf module install idm:DL1/dns -y

Verify network connection on ipa3

[tomas@ipa3 ~]$ ping 10.0.2.38  (IP Address of IPA1)[tomas@ipa3 ~]$ cat /etc/resolv.conf 
# Generated by NetworkManager
search ipa.tomdus.lab
nameserver 10.0.2.38
[tomas@ipa3 ~]$ dig ipa1.ipa.tomdus.lab
; <<>> DiG 9.11.36-RedHat-9.11.36-3.el8 <<>> ipa1.ipa.tomdus.lab
;; global options: +cmd
;; Got answer:
;; ->>HEADER<<- opcode: QUERY, status: NOERROR, id: 10689
;; flags: qr aa rd; QUERY: 1, ANSWER: 1, AUTHORITY: 2, ADDITIONAL: 2
;; WARNING: recursion requested but not available

;; OPT PSEUDOSECTION:
; EDNS: version: 0, flags:; udp: 1232
; COOKIE: b6dd4e79f5137f6a795623dc62a096d3ae0ca70d1d10c863 (good)
;; QUESTION SECTION:
;ipa1.ipa.tomdus.lab. IN A

;; ANSWER SECTION:
ipa1.ipa.tomdus.lab. 1200 IN A 10.0.2.38

;; AUTHORITY SECTION:
ipa.tomdus.lab. 86400 IN NS ipa1.ipa.tomdus.lab.

;; Query time: 1 msec
;; SERVER: 10.0.2.38#53(10.0.2.38)
;; WHEN: Wed Jun 08 14:32:17 CEST 2022
;; MSG SIZE rcvd: 141

Install client

[tomas@ipa3 ~]$ sudo dnf install ipa-server -y[tomas@ipa3 ~]$ sudo ipa-client-install --mkhomedir --domain=ipa.tomdus.lab --realm IPA.TOMDUS.LAB --principal admin --password 123456798 --no-ntp
This program will set up IPA client.
Version 4.9.8

Discovery was successful!
Client hostname: ipa3.ipa.tomdus.lab
Realm: IPA.TOMDUS.LAB
DNS Domain: ipa.tomdus.lab
IPA Server: ipa1.ipa.tomdus.lab
BaseDN: dc=ipa,dc=tomdus,dc=lab

Continue to configure the system with these values? [no]: yes
Skipping chrony configuration
Successfully retrieved CA cert
Subject: CN=Certificate Authority,O=IPA.TOMDUS.LAB
Issuer: CN=Certificate Authority,O=IPA.TOMDUS.LAB
Valid From: 2022-06-02 06:40:56
Valid Until: 2042-06-02 06:40:56

Enrolled in IPA realm IPA.TOMDUS.LAB
Created /etc/ipa/default.conf
Configured /etc/sssd/sssd.conf
Configured /etc/krb5.conf for IPA realm IPA.TOMDUS.LAB
Systemwide CA database updated.
Hostname (ipa3.ipa.tomdus.lab) does not have A/AAAA record.
Missing reverse record(s) for address(es): 10.0.3.5.
Adding SSH public key from /etc/ssh/ssh_host_ecdsa_key.pub
Adding SSH public key from /etc/ssh/ssh_host_ed25519_key.pub
Adding SSH public key from /etc/ssh/ssh_host_rsa_key.pub
SSSD enabled
Configured /etc/openldap/ldap.conf
Configured /etc/ssh/ssh_config
Configured /etc/ssh/sshd_config
Configuring ipa.tomdus.lab as NIS domain.
Client configuration complete.
The ipa-client-install command was successful

Client has been succesfully registered and visible inside IPA server
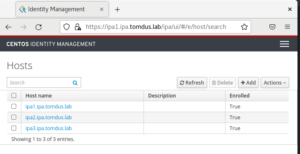
3. Promote client ipa3 to replica

In order to promote client as a replica the client muss be assigned to host group ipaservers
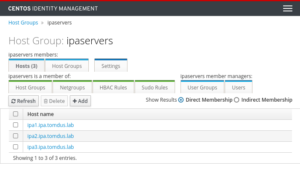
Check DNS entries for ipa3

[tomas@ipa3 ~]$ dig +short ipa3.ipa.tomdus.lab
10.0.3.5[tomas@ipa3 ~]$ host -r 10.0.3.5
Host 5.3.0.10.in-addr.arpa. not found: 3(NXDOMAIN)

Common problem that can be solved inside DNS
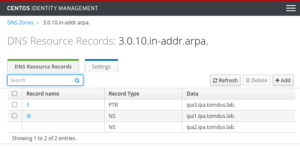
Check – OK

[tomas@ipa3 ~]$ dig +short ipa3.ipa.tomdus.lab
10.0.3.5[tomas@ipa3 ~]$ host -r 10.0.3.5
5.3.0.10.in-addr.arpa domain name pointer ipa3.ipa.tomdus.lab.

Promote client to replica

[tomas@ipa3 ~]$ sudo ipa-replica-install --admin-password=123456798 --mkhomedir --ssh-trust-dns --setup-dns --forwarder=192.168.178.1 --auto-reverse --allow-zone-overlap
Lookup failed: Preferred host ipa3.ipa.tomdus.lab does not provide DNS.
Checking DNS forwarders, please wait ...
Reverse record for IP address 10.0.3.5 already exists OK as we corrected is manually above
Run connection check to master
Connection check OK
Disabled p11-kit-proxy
Configuring directory server (dirsrv). Estimated time: 30 seconds[1/38]: creating directory server instance
Validate installation settings ...
Create file system structures ...
Perform SELinux labeling ...
Create database backend: dc=ipa,dc=tomdus,dc=lab ...
Perform post-installation tasks ...[2/38]: tune ldbm plugin[3/38]: adding default schema[4/38]: enabling memberof plugin[5/38]: enabling winsync plugin[6/38]: configure password logging[7/38]: configuring replication version plugin[8/38]: enabling IPA enrollment plugin[9/38]: configuring uniqueness plugin[10/38]: configuring uuid plugin[11/38]: configuring modrdn plugin[12/38]: configuring DNS plugin[13/38]: enabling entryUSN plugin[14/38]: configuring lockout plugin[15/38]: configuring topology plugin[16/38]: creating indices[17/38]: enabling referential integrity plugin[18/38]: configuring certmap.conf[19/38]: configure new location for managed entries[20/38]: configure dirsrv ccache and keytab[21/38]: enabling SASL mapping fallback[22/38]: restarting directory server[23/38]: creating DS keytab[24/38]: ignore time skew for initial replication[25/38]: setting up initial replication
Starting replication, please wait until this has completed.
Update in progress, 4 seconds elapsed
Update succeeded
[26/38]: prevent time skew after initial replication[27/38]: adding sasl mappings to the directory[28/38]: updating schema[29/38]: setting Auto Member configuration[30/38]: enabling S4U2Proxy delegation[31/38]: initializing group membership[32/38]: adding master entry[33/38]: initializing domain level[34/38]: configuring Posix uid/gid generation[35/38]: adding replication acis[36/38]: activating sidgen plugin[37/38]: activating extdom plugin[38/38]: configuring directory to start on boot
Done configuring directory server (dirsrv).
Replica DNS records could not be added on master: Insufficient access: Insufficient 'add' privilege to add the entry 'idnsname=ipa3,idnsname=ipa.tomdus.lab.,cn=dns,dc=ipa,dc=tomdus,dc=lab'.
Configuring Kerberos KDC (krb5kdc)[1/5]: configuring KDC[2/5]: adding the password extension to the directory[3/5]: creating anonymous principal[4/5]: starting the KDC[5/5]: configuring KDC to start on boot
Done configuring Kerberos KDC (krb5kdc).
Configuring kadmin[1/2]: starting kadmin [2/2]: configuring kadmin to start on boot
Done configuring kadmin.
Configuring directory server (dirsrv)[1/3]: configuring TLS for DS instance[2/3]: importing CA certificates from LDAP[3/3]: restarting directory server
Done configuring directory server (dirsrv).
Configuring the web interface (httpd)[1/22]: stopping httpd[2/22]: backing up ssl.conf[3/22]: disabling nss.conf[4/22]: configuring mod_ssl certificate paths[5/22]: setting mod_ssl protocol list[6/22]: configuring mod_ssl log directory[7/22]: disabling mod_ssl OCSP[8/22]: adding URL rewriting rules[9/22]: configuring httpd
Nothing to do for configure_httpd_wsgi_conf[10/22]: setting up httpd keytab[11/22]: configuring Gssproxy[12/22]: setting up ssl[13/22]: configure certmonger for renewals[14/22]: publish CA cert[15/22]: clean up any existing httpd ccaches[16/22]: enable ccache sweep[17/22]: configuring SELinux for httpd[18/22]: create KDC proxy config[19/22]: enable KDC proxy[20/22]: starting httpd[21/22]: configuring httpd to start on boot[22/22]: enabling oddjobd
Done configuring the web interface (httpd).
Configuring ipa-otpd[1/2]: starting ipa-otpd [2/2]: configuring ipa-otpd to start on boot
Done configuring ipa-otpd.
Custodia uses 'ipa1.ipa.tomdus.lab' as master peer.
Configuring ipa-custodia[1/4]: Generating ipa-custodia config file[2/4]: Generating ipa-custodia keys[3/4]: starting ipa-custodia [4/4]: configuring ipa-custodia to start on boot
Done configuring ipa-custodia.
Configuring certificate server (pki-tomcatd)[1/2]: configure certmonger for renewals[2/2]: Importing RA key
Done configuring certificate server (pki-tomcatd).
Configuring Kerberos KDC (krb5kdc)[1/1]: installing X509 Certificate for PKINIT
Done configuring Kerberos KDC (krb5kdc).
Applying LDAP updates
Upgrading IPA:. Estimated time: 1 minute 30 seconds[1/10]: stopping directory server[2/10]: saving configuration[3/10]: disabling listeners[4/10]: enabling DS global lock[5/10]: disabling Schema Compat[6/10]: starting directory server[7/10]: upgrading server[8/10]: stopping directory server[9/10]: restoring configuration[10/10]: starting directory server
Done.
Finalize replication settings
Restarting the KDC
dnssec-validation yes
Configuring DNS (named)[1/8]: generating rndc key file[2/8]: setting up our own record[3/8]: adding NS record to the zones[4/8]: setting up kerberos principal[5/8]: setting up named.conf
created new /etc/named.conf
created named user config '/etc/named/ipa-ext.conf'
created named user config '/etc/named/ipa-options-ext.conf'
created named user config '/etc/named/ipa-logging-ext.conf'[6/8]: setting up server configuration[7/8]: configuring named to start on boot[8/8]: changing resolv.conf to point to ourselves
Done configuring DNS (named).
Restarting the web server to pick up resolv.conf changes
Configuring DNS key synchronization service (ipa-dnskeysyncd)[1/7]: checking status[2/7]: setting up bind-dyndb-ldap working directory[3/7]: setting up kerberos principal[4/7]: setting up SoftHSM[5/7]: adding DNSSEC containers
DNSSEC container exists (step skipped)[6/7]: creating replica keys[7/7]: configuring ipa-dnskeysyncd to start on boot
Done configuring DNS key synchronization service (ipa-dnskeysyncd).
Restarting ipa-dnskeysyncd
Restarting named
Updating DNS system records

Global DNS configuration in LDAP server is not empty
The following configuration options override local settings in named.conf:

API Version number was not sent, forward compatibility not guaranteed. Assuming server's API version, 2.245
Forward policy: first
IPA DNS servers: ipa1.ipa.tomdus.lab, ipa2.ipa.tomdus.lab

Configuring SID generation[1/7]: creating samba domain object
Samba domain object already exists[2/7]: adding admin(group) SIDs
Admin SID already set, nothing to do
Admin group SID already set, nothing to do[3/7]: adding RID bases
RID bases already set, nothing to do[4/7]: updating Kerberos config
'dns_lookup_kdc' already set to 'true', nothing to do.[5/7]: activating sidgen task[6/7]: restarting Directory Server to take MS PAC and LDAP plugins changes into account[7/7]: adding fallback group
Fallback group already set, nothing to do
Done.

WARNING: The CA service is only installed on one server (ipa1.ipa.tomdus.lab).
It is strongly recommended to install it on another server.
Run ipa-ca-install(1) on another master to accomplish this.

The ipa-replica-install command was successful

Enable firewall

sudo firewall-cmd --add-service={http,https,ldap,ldaps,kerberos,kpasswd,dns} --permanent
sudo firewall-cmd --reload

4. Install ca certificates on ipa3

[tomas@ipa3 ~]$ sudo ipa-ca-install
Directory Manager (existing master) password:

Run connection check to master
Connection check OK
Configuring certificate server (pki-tomcatd). Estimated time: 3 minutes[1/28]: creating certificate server db[2/28]: setting up initial replication
Starting replication, please wait until this has completed.
Update in progress, 5 seconds elapsed
Update succeeded
[3/28]: creating ACIs for admin
...[26/28]: importing IPA certificate profiles[27/28]: configuring certmonger renewal for lightweight CAs[28/28]: deploying ACME service
Done configuring certificate server (pki-tomcatd).
Updating DNS system records

VirtualBox and two separates NATs

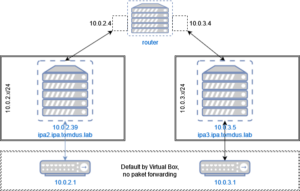
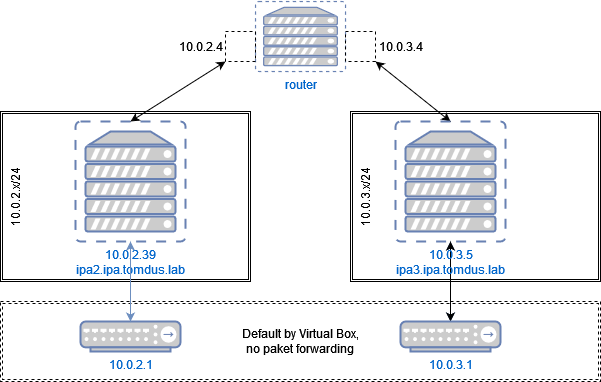
Aim is to create two networks (10.0.2.x and 10.0.3.x) in VirtualBox and be enable ip routing between them. At first there is no default routing (AFAIK) implemented in VirtualBox for such a scenario, thus the creation of a separate router is required.

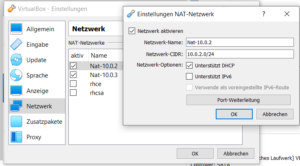
There are two separates networks 10.0.2.x and 10.0.3.x defined in VirtualBox


Further more we need for such an example 3 virtual machines:
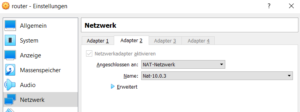
• router with two networks (10.0.2.x and 10.0.3.x)
• ipa2 network 10.0.2.39/24
• ipa3 network 10.0.3.5/24
Both ipa2 and ipa3 have virbr0 for internet connection (i.e. package updates)

Network on “router”

[tomas@router ~]$ ip a
1: lo: <LOOPBACK,UP,LOWER_UP> mtu 65536 qdisc noqueue state UNKNOWN group default qlen 1000
link/loopback 00:00:00:00:00:00 brd 00:00:00:00:00:00
inet 127.0.0.1/8 scope host lo
valid_lft forever preferred_lft forever
inet6 ::1/128 scope host
valid_lft forever preferred_lft forever
2: enp0s3: <BROADCAST,MULTICAST,UP,LOWER_UP> mtu 1500 qdisc fq_codel state UP group default qlen 1000
link/ether 08:00:27:a7:20:28 brd ff:ff:ff:ff:ff:ff
inet 10.0.2.4/24 brd 10.0.2.255 scope global noprefixroute enp0s3
valid_lft forever preferred_lft forever
3: enp0s8: <BROADCAST,MULTICAST,UP,LOWER_UP> mtu 1500 qdisc fq_codel state UP group default qlen 1000
link/ether 08:00:27:ea:77:c4 brd ff:ff:ff:ff:ff:ff
inet 10.0.3.4/24 brd 10.0.3.255 scope global noprefixroute enp0s8
valid_lft forever preferred_lft forever
[tomas@router ~]$ ip r
default via 10.0.3.1 dev enp0s8 proto static metric 101
10.0.2.0/24 dev enp0s3 proto kernel scope link src 10.0.2.4 metric 100
10.0.3.0/24 dev enp0s8 proto kernel scope link src 10.0.3.4 metric 101

Enable ipv4 forwarding in kernel

[tomas@router ~]$ sudo sysctl net.ipv4.ip_forward=1
net.ipv4.ip_forward = 1[tomas@router ~]$ sudo sysctl net.ipv4.ip_forward
net.ipv4.ip_forward = 1

Network Connection on ipa2 (ipa3 is similar)

[tomas@ipa2 ~]$ ip a
1: lo: <LOOPBACK,UP,LOWER_UP> mtu 65536 qdisc noqueue state UNKNOWN group default qlen 1000
link/loopback 00:00:00:00:00:00 brd 00:00:00:00:00:00
inet 127.0.0.1/8 scope host lo
valid_lft forever preferred_lft forever
inet6 ::1/128 scope host
valid_lft forever preferred_lft forever
2: enp0s3: <BROADCAST,MULTICAST,UP,LOWER_UP> mtu 1500 qdisc fq_codel state UP group default qlen 1000
link/ether 08:00:27:e5:0e:7b brd ff:ff:ff:ff:ff:ff
inet 10.0.2.39/24 brd 10.0.2.255 scope global noprefixroute enp0s3
valid_lft forever preferred_lft forever
3: virbr0: <NO-CARRIER,BROADCAST,MULTICAST,UP> mtu 1500 qdisc noqueue state DOWN group default qlen 1000
link/ether 52:54:00:e1:ad:57 brd ff:ff:ff:ff:ff:ff
inet 192.168.122.1/24 brd 192.168.122.255 scope global virbr0
valid_lft forever preferred_lft forever

Additional routing for 10.0.3.x network:

[tomas@ipa2 ~]$ sudo nmcli connection modify enp0s3 +ipv4.routes "10.0.3.0/24 10.0.2.4"[tomas@ipa2 ~]$ sudo nmcli connection down enp0s3 [tomas@ipa2 ~]$ sudo nmcli connection up enp0s3 
[tomas@ipa2 ~]$ ip r
default via 10.0.3.1 dev enp0s3 proto static metric 100
10.0.2.0/24 dev enp0s3 proto kernel scope link src 10.0.2.39 metric 100
10.0.3.0/24 via 10.0.2.4 dev enp0s3 proto static metric 100
192.168.122.0/24 dev virbr0 proto kernel scope link src 192.168.122.1 linkdown

Checks

[tomas@ipa2 ~]$ ping 10.0.3.5
PING 10.0.3.5 (10.0.3.5) 56(84) bytes of data.
64 bytes from 10.0.3.5: icmp_seq=1 ttl=63 time=1.94 ms
[tomas@ipa3 ~]$ ping 10.0.2.39
PING 10.0.2.39 (10.0.2.39) 56(84) bytes of data.
64 bytes from 10.0.2.39: icmp_seq=1 ttl=63 time=0.899 ms

Create Toolchain with ptxdist

This is a small introduction to create a toolchain with ptxdist (Version ptxdist-2019.08.0.tar.bz2)


sudo apt install libncurses5-dev python-dev

cd
mkdir ptxdist
cd ptxdist
wget http://public.pengutronix.de/software/ptxdist/ptxdist-2019.08.0.tar.bz2
tar -xjf ptxdist-2019.08.0.tar.bz2
cd ptxdist-2019.08.0
./configure --prefix /home/tomas/ptxdist/install
make
make install
cd /home/tomas/ptxdist/install/bin/
./ptxdist setup

Create your own toolchain

sudo apt install python3-dev
cd /home/tomas/ptxdist
wget https://public.pengutronix.de/oselas/toolchain/OSELAS.Toolchain-2018.12.0.tar.bz2
tar -xjf OSELAS.Toolchain-2018.12.0.tar.bz2
cd OSELAS.Toolchain-2018.12.0/
/home/tomas/ptxdist/install/bin/ptxdist-2019.08.0 select ptxconfigs/i686-atom-linux-gnu_gcc-8.2.1_glibc-2.28_binutils-2.31.1_kernel-4.19-sanitized.ptxconfig
/home/tomas/ptxdist/install/bin/ptxdist-2019.08.0 migrate
/home/tomas/ptxdist/install/bin/ptxdist-2019.08.0 go

change in selected_ptxconfig from PTXCONF_PREFIX=“/opt“ to PTXCONF_PREFIX=“/home/tomas/ptxdist/toolchain“

How To Setup and Orange PI One

This is a small introduction to setup orange pi one

Format and prepare SD Card

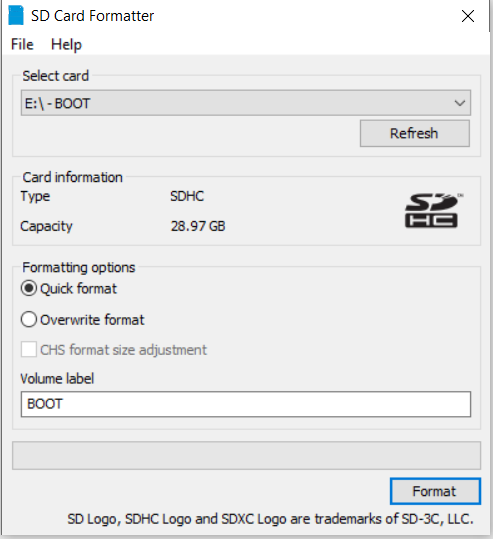
Prepare 32GB SD Card, thus Orange Pi One can boot from up to 32GB SD Card. I am using SDCard Formatter,

Install Linux image on SD Card

Download image, e.g Debian Buster based version from https://www.armbian.com/orange-pi-one/.

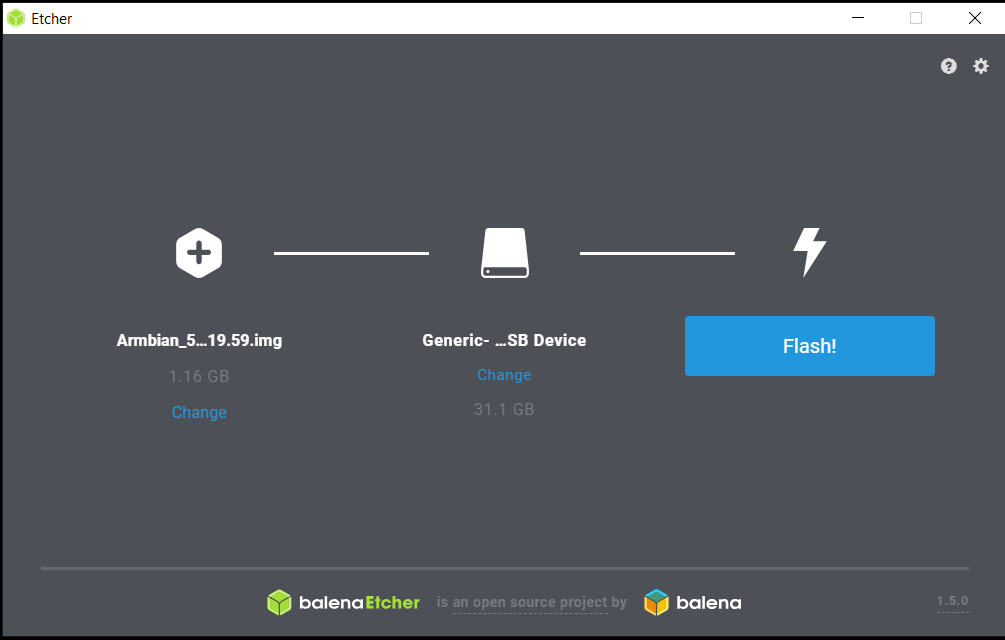
Use e.g. Etcher to flash linux image to SD Card:

First time boot

Insert an SD Card into Orange Pi One and connect power supply